Writing Scripts and Working with Data
Overview
Teaching: 20 min
Exercises: 20 minQuestions
How can we automate a commonly used set of commands?
Objectives
Use the
nanotext editor to modify text files.Write a basic shell script.
Use the
bashcommand to execute a shell script.Use
chmodto make a script an executable program.
Writing files
We’ve been able to do a lot of work with files that already exist, but what if we want to write our own files? We’re not going to type in a FASTA file, but we’ll see as we go through other tutorials, there are a lot of reasons we’ll want to write a file, or edit an existing file.
To add text to files, we’re going to use a text editor called Nano. We’re going to create a file to take notes about what we’ve been doing with the data files in ~/shell_data/untrimmed_fastq.
This is good practice when working in bioinformatics. We can create a file called README.txt that describes the data files in the directory or documents how the files in that directory were generated. As the name suggests, it’s a file that we or others should read to understand the information in that directory.
Let’s change our working directory to ~/shell_data/untrimmed_fastq using cd,
then run nano to create a file called README.txt:
$ cd ~/shell_data/untrimmed_fastq
$ nano README.txt
You should see something like this:
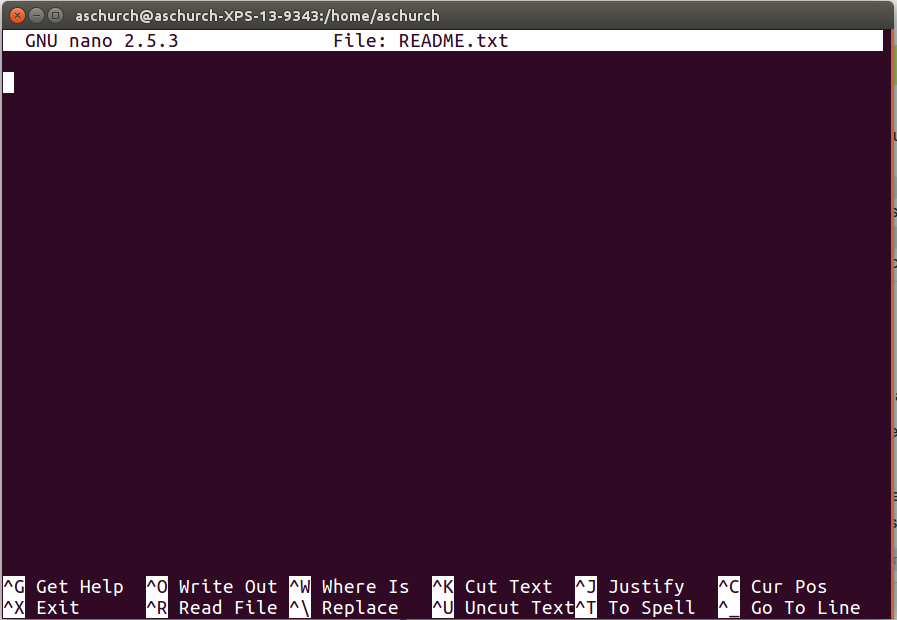
The text at the bottom of the screen shows the keyboard shortcuts for performing various tasks in nano. We will talk more about how to interpret this information soon.
Which Editor?
When we say, “
nanois a text editor,” we really do mean “text”: it can only work with plain character data, not tables, images, or any other human-friendly media. We use it in examples because it is one of the least complex text editors. However, because of this trait, it may not be powerful enough or flexible enough for the work you need to do after this workshop. On Unix systems (such as Linux and Mac OS X), many programmers use Emacs or Vim (both of which require more time to learn), or a graphical editor such as Gedit. On Windows, you may wish to use Notepad++. Windows also has a built-in editor callednotepadthat can be run from the command line in the same way asnanofor the purposes of this lesson. If you are planning to take a deep dive into bioinformatics and computational biology then it is probably worth your while learningvim.nanowill be fine for now but make a mental bookmark to learnvim.If you are going to draft a long text file from scratch, then most people find it easier to use a graphical text editor. Two excellent options are
[Atom](https://atom.io/)and[Sublime](https://www.sublimetext.com/). These editors provide syntax highlighting and code completion and many other useful features. You can also usesshfswithAtomorSublimeto save your files directly to the cluster, or edit files already on the cluster.Despite the advantages of these graphical editors, there are many situations where it is extremely helpful to be able to create or edit a text file from the terminal.
No matter what editor you use, you will need to know where it searches for and saves files. If you start it from the shell, it will (probably) use your current working directory as its default location. If you use your computer’s start menu, it may want to save files in your desktop or documents directory instead. You can change this by navigating to another directory the first time you “Save As…”
Let’s type in a few lines of text. Describe what the files in this
directory are or what you’ve been doing with them.
Once we’re happy with our text, we can press Ctrl-O (press the Ctrl or Control key and, while
holding it down, press the O key) to write our data to disk. You’ll be asked what file we want to save this to:
press Return to accept the suggested default of README.txt.
Once our file is saved, we can use Ctrl-X to quit the editor and return to the shell.
Control, Ctrl, or ^ Key
The Control key is also called the “Ctrl” key. There are various ways in which using the Control key may be described. For example, you may see an instruction to press the Ctrl key and, while holding it down, press the X key, described as any of:
Control-XControl+XCtrl-XCtrl+X^XC-xIn
nano, along the bottom of the screen you’ll see^G Get Help ^O WriteOut. This means that you can use Ctrl-G to get help and Ctrl-O to save your file.Press Ctrl-G to view the inbuilt help. Then press Ctrl-V to scroll down. You will see key combinations for all sorts of useful functions, such as scrolling through the document, jumping to the beginning or end of the line, searching for phrases, copying and pasting text, etc. Note that if you are using a Mac the “meta” key is the esc key. For key combinations such as
M-/(which takes you to the last line in the file), M refers to the “meta” key. On a PC this will be either “Alt” or “Esc”. On a Mac, this will be “Esc” by default, but you can change this to “Option” with Preferences > Profiles > Keyboard > “Use Option as Meta key”. Press Ctrl-X to exit the help page and return to the editor.
Now you’ve written a file. You can take a look at it with less or cat, or open it up again and edit it with nano.
Exercise
Open
README.txtand add the date to the top of the file and save the file.Solution
Use
nano README.txtto open the file.
Add today’s date and then use Ctrl-X followed byyand Enter to save.
Exercise
Open
~/.bash_aliasesagain and change one of the aliases to something more memorable, or customise the way that “ll” works, for example.Solution
Use
nano ~/.bash_aliasesto open the file.
After that, there is no correct answer. Make changes that work for you – it’s your work environment!!
Nano versus less
Once people discover nano, they often start using nano to view the contents of files.
This works, of course, but there is a risk that you might accidentally overwrite something important.
Stick with cat and less in situations where you just want to have a look.
It’s a whole lot safer that way.
Writing scripts
A really powerful thing about the command line is that you can write scripts. Scripts let you save commands to run them and also lets you put multiple commands together. Though writing scripts may require an additional time investment initially, this can save you time as you run them repeatedly. Scripts can also address the challenge of reproducibility: if you need to repeat an analysis, you retain a record of your command history within the script. Wetlab scientists are keenly aware of the importance of documenting experimental procedures. Scripts allow you to document your drylab (computational) experiements, while also offering many other advantages.
One thing we will commonly want to do with sequencing results is pull out bad reads and write them to a file to see if we can figure out what’s going on with them. We’re going to look for reads with long sequences of N’s like we did before, but now we’re going to write a script, so we can run it each time we get new sequences, rather than type the code in by hand each time.
We’re going to create a new file to put this command in.
We’ll call it bad-reads-script.sh.
The sh isn’t required, but using that extension tells us that it’s a shell script.
$ nano bad-reads-script.sh
Bad reads have a lot of N’s, so we’re going to look for NNNNNNNNNN with grep. We want the whole FASTQ record, so we’re also going to get the one line above the sequence and the two lines below. We also want to look in all the files that end with .fastq, so we’re going to use the * wildcard.
grep -B1 -A2 --no-filename NNNNNNNNNN *.fastq | grep --invert-match '^--' > scripted_bad_reads.txt
Custom
grepcontrolWe introduced the
--invert-matchoption in the previous episode, now we are using--no-filenameto “Suppress the prefixing of file names on output” according to the documentation shown byman grep. The short form of--no-filenameis-h.
Type your grep command into the file and save it as before.
Be careful that you did not add the $ at the beginning of the line.
Now comes the neat part. We can run this script. Type:
$ bash bad-reads-script.sh
It will look like nothing happened, but now if you look at scripted_bad_reads.txt, you can see that there are now reads in the file.
Exercise
We want the script to tell us when it’s done.
- Open
bad-reads-script.shand add the lineecho "Script finished!"after thegrepcommand and save the file.- Run the updated script.
Solution
  $ bash bad-reads-script.sh
  Script finished!
Making the script into a program
We had to type bash because we needed to tell the computer what program to use to run this script.
Instead, we can turn this script into its own program.
We need to tell it that it’s a program by making it executable.
We can do this by changing the file permissions.
We talked about permissions in an earlier episode.
First, let’s look at the current permissions.
$ ls -l bad-reads-script.sh
-rw-rw-r-- 1 user user 0 Oct 25 21:46 bad-reads-script.sh
We see that it says -rw-r--r--. This shows that the file can be read by any user and written to by the file owner (you). We want to change these permissions so that the file can be executed as a program. We use the command chmod like we did earlier when we removed write permissions. Here we are adding (+) executable permissions (+x).
$ chmod +x bad-reads-script.sh
Now let’s look at the permissions again.
$ ls -l bad-reads-script.sh
-rwxrwxr-x 1 user user 0 Oct 25 21:46 bad-reads-script.sh
Now we see that it says -rwxr-xr-x.
The x’s that are there now tell us we can run it as a program.
So, let’s try it!
We’ll need to put ./ at the beginning so the computer knows to look here in this directory for the program.
$ ./bad-reads-script.sh
The script should run the same way as before, but now we’ve created our very own computer program!
You will learn more about writing scripts in a later lesson.
Moving and Downloading Data
So far, we’ve worked with data that is alread on the cluster. Usually, however, most analyses begin with moving data onto the cluster. Below we’ll show you some commands to download data onto the cluster, or to move data between your computer and the cluster.
Getting data from the cloud
There are two programs that will download data from a remote server to your local
(or remote) machine: wget and curl. They were designed to do slightly different
tasks by default, so you’ll need to give the programs somewhat different options to get
the same behaviour, but they are mostly interchangeable.
-
wgetis short for “world wide web get”, and it’s basic function is to download web pages or data at a web address. -
cURLis a pun, it is supposed to be read as “see URL”, so its basic function is to display webpages or data at a web address.
Roughly speaking, wget is easier to use but curl is more flexible.
Both of these tools are available on Wolfpack, but not necessarily on your laptop,
as most operating systems will only have one or the other installed by default.
A quick way to check which tools you have is with which.
which is a BASH program that looks through everything you have
installed, and tells you what folder it is installed to. If it can’t
find the program you asked for, it returns nothing, i.e. gives you no
results.
Check by using the following commands, first on the cluster then again on a terminal session that is not connected to the cluster.
$ which curl
$ which wget
On Mac OSX, you’ll likely get the following output:
$ which curl
/usr/bin/curl
$ which wget
$
This output means that you have curl installed, but not wget.
If you want to install wget on your Mac, then use brew install wget.
This assumes that you already installed Homebrew as part of your preparation of the course.
If not, then do it now.
Let’s say you want to download some data from Ensembl. We’re going to download a very small
tab-delimited file that just tells us what data is available on the Ensembl bacteria server.
We can either use wget …
$ cd
$ wget ftp://ftp.ensemblgenomes.org/pub/release-37/bacteria/species_EnsemblBacteria.txt
or curl …
$ cd
$ curl -O ftp://ftp.ensemblgenomes.org/pub/release-37/bacteria/species_EnsemblBacteria.txt
Since we wanted to download the file rather than just view it, we used wget without
any modifiers. With curl however, we had to use the -O flag, which simultaneously tells curl to
download the page instead of showing it to us and specifies that it should save the
file using the same name it had on the server: species_EnsemblBacteria.txt
It’s important to note that both curl and wget download to the computer that the
command line belongs to. So, if you are logged into the cluster and execute
the curl command above in the terminal then the file will be downloaded to the cluster,
not your local machine.
Moving files between your laptop and the cluster
What if the data you need is on your local computer, but you need to copy it to the cluster? There are also several ways to do this, but it’s always easier to start the transfer locally. This means if you’re typing into a terminal, the terminal should not be logged into the cluster, it should be showing your local computer. If you’re using a transfer program, it needs to be installed on your local machine, not on the cluster.
Transferring Data Between your Local Machine and the Cluster
These directions are platform specific, so please follow the instructions for your system:
Please select the platform you wish to use for the exercises:
Uploading Data to the cluster with scp
scp stands for ‘secure copy protocol’, and is a widely used UNIX tool for moving files
between computers. The simplest way to use scp is to run it in your local terminal,
and use it to copy a single file:
scp <file I want to move> <where I want to move it>
Note that you are always running scp locally, but that doesn’t mean that you can only move files from your local computer.
In order to move a file from your local computer to the cluster, the command would look like this:
$ scp <local file> <host>:<path>
To move it back to your local computer, you re-order the to and from fields:
$ scp <host>:<path> <local file>
Uploading Data to the cluster with scp
Open the terminal and use the scp command to upload a file (e.g. local_file.txt)
to your home directory. This command makes a connection to the cluster, so you will need to be
either plugged into the ethernet in the Garvan building or connected via the VPN.
Don’t forget to swap both instances of “user” to your Garvan ID.
$ scp local_file.txt user@dice01:/home/user/
Downloading Data from the cluster with scp
Let’s download a text file from our remote machine. You should have a file that contains bad reads called ~/shell_data/scripted_bad_reads.txt.
Tip: If you are looking for another (or any really) text file in your home directory to use instead, try:
$ find ~ -name .bash*
If there are a lot of files and directories to search through, the find command can take quite a while to do its thing.
So when you specify the starting point for the search (“~” in the example above) try to get as close as possible to where you expect the target files to be.
Like the tree command, the find command doesn’t follow symbolic links by default.
We are using a lot of links, so specify the “-L” flag before the search path, as follows.
$ find -L ~ -name *.fastq
The tree command uses “-l” (lowercase) to follow links while the find command uses “-L”.
You’re right, this is not very consistent.
That’s because different commands were created by different people at different times.
If in doubt, consult the man pages.
Download the bad reads file in ~/shell_data/scripted_bad_reads.txt to your home ~/Download directory using the following command (make sure you substitute user@dice01 with your login credentials):
$ scp user@dice01:/home/user/shell_data/untrimmed_fastq/scripted_bad_reads.txt ~/Downloads
Remember that in both instances, the command is run from your local machine, we’ve just flipped the order of the to and from parts of the command.
A powerful alternative to scp is rsync. This is particularly useful for large files, because you can
(optionally) view the progress of the file transfer, and because rsync can resume transfers that have
been interrupted without having to start all over again. Use man rsync to view options or Google for examples.
You can also use rsync and scp to copy files between two different remote servers.
But when copying files back and forth between your laptop and the cluster it is probably easier
to use sshfs to mount a cluster volume and then use familiar drag and drop operations.
Uploading Data to the cluster with PSCP
If you’re using a PC, we recommend you use the PSCP program. This program is from the same suite of tools as the PuTTY program we have been using to connect.
- If you haven’t done so, download pscp from http://the.earth.li/~sgtatham/putty/latest/x86/pscp.exe
- Make sure the PSCP program is somewhere you know on your computer. In this case, your Downloads folder is appropriate.
- Open the windows PowerShell; go to your start menu/search enter the term ‘cmd’; you will be able to start the shell (the shell should start from C:\Users\your-pc-username>).
- Change to the Downloads directory:
> cd Downloads
- Locate a file on your computer that you wish to upload (be sure you know the path). Then upload it to your remote machine. You will be prompted to enter a password, and then your upload will begin. (make sure you substitute ‘your-pc-username’ for your actual pc username and ‘user’ for your Garvan ID)
C:\User\your-pc-username\Downloads> pscp.exe -P 22 local_file.txt user@dice01:/home/user/
Downloading Data from your Virtual Machine with PSCP
- Follow the instructions in the Upload section to download (if needed) and access the PSCP program (steps 1-3)
- Download the text file using the following command (make sure you substitute ‘your-pc-username’ for your actual pc username and ‘user’ for your Garvan ID)
C:\User\your-pc-username\Downloads> pscp.exe user@dice01:/home/user/shell_data/untrimmed_fastq/scripted_bad_reads.txt local_file.txt

C:\User\your-pc-username\Downloads
The are graphical tools for transferring files as well, such as sshfs-win and Filezilla.
sshfs-win can’t follow symbolic links.
Key Points
Scripts are a collection of commands executed together.
Transferring information to and from virtual and local computers.